Tables: a step-by-step guide
What a table is, how to create one, link it to another, fill it in and show it in the app — from scratch, no coding.
A table is a list of records of one kind, like a sheet in Excel. Each row is one record: one event, one product, one request. Each column is something known about every record: a title, a date, a price, a picture. The app takes the records from the table and draws a card for each one — you do not build thirty identical cards by hand.
Where: At the top of the editor, the Canvas — Map — Data switch → Data. Or the Data tab in the left panel → Table schema. On a phone: the bottom bar → Data → Table schema.
Data has two floors. At the top, the schema: every table is a card with all its columns, and links between tables are lines. Below, the chosen table in full: its rows and columns.
Step 1. Create a table and its columns
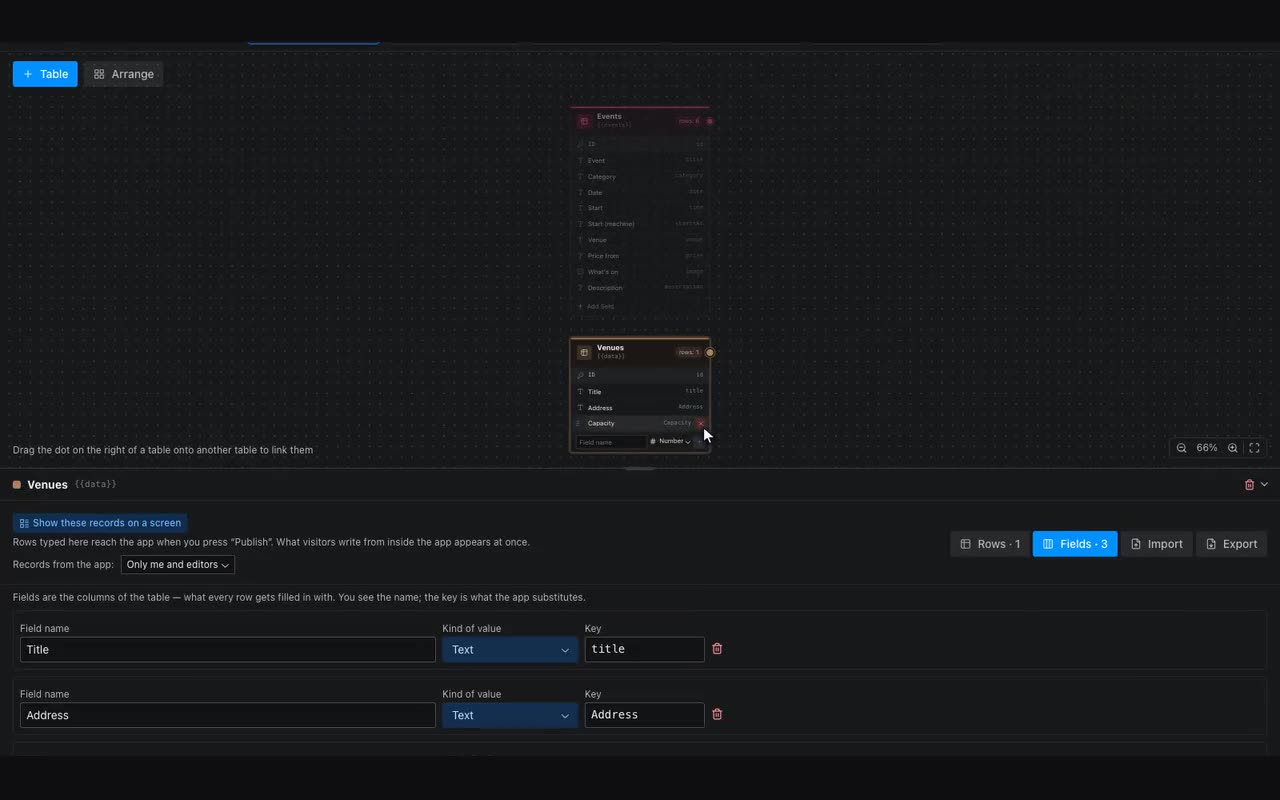
- Click + Table and pick Empty. The ready-made ones — Products, List, Users — come with columns already.
- Type the table’s name right away, for example “Venues”, and press Enter. To rename later, double-click the card’s header.
- At the bottom of the card click Add field, type the column’s name (“Address”), pick its type on the right and press Enter. The row stays open for the next column.
- To delete a column, use the cross on its right (it appears under the pointer). To reorder, drag a column by the dots on its left.
| Column type | What it holds |
|---|---|
| Text | Any text: a title, a description, an address |
| Number | A price, a number of seats, points — what you compare and count |
| Yes / no | A tick: “in stock”, “bestseller”, “paid” |
| Image, Icon, Video, File | Uploaded with a button right in the cell |
| Date, Date and time, Time | Picked in a calendar; used to sort and to hide what has passed |
| Choice, Multiple choice | A short set of options: “6+, 12+, 18+”, “Concerts, Theatre” |
| Link | A pointer to a row of another table — see step 2 |
| Formula | Works itself out from other columns: start + duration |
| Random code | Fills itself in: a ticket or order number |
Step 2. Link the tables. Why: the venue’s address is stored once, in Venues. An event only points at its venue — change the address and it changes in every event at once.
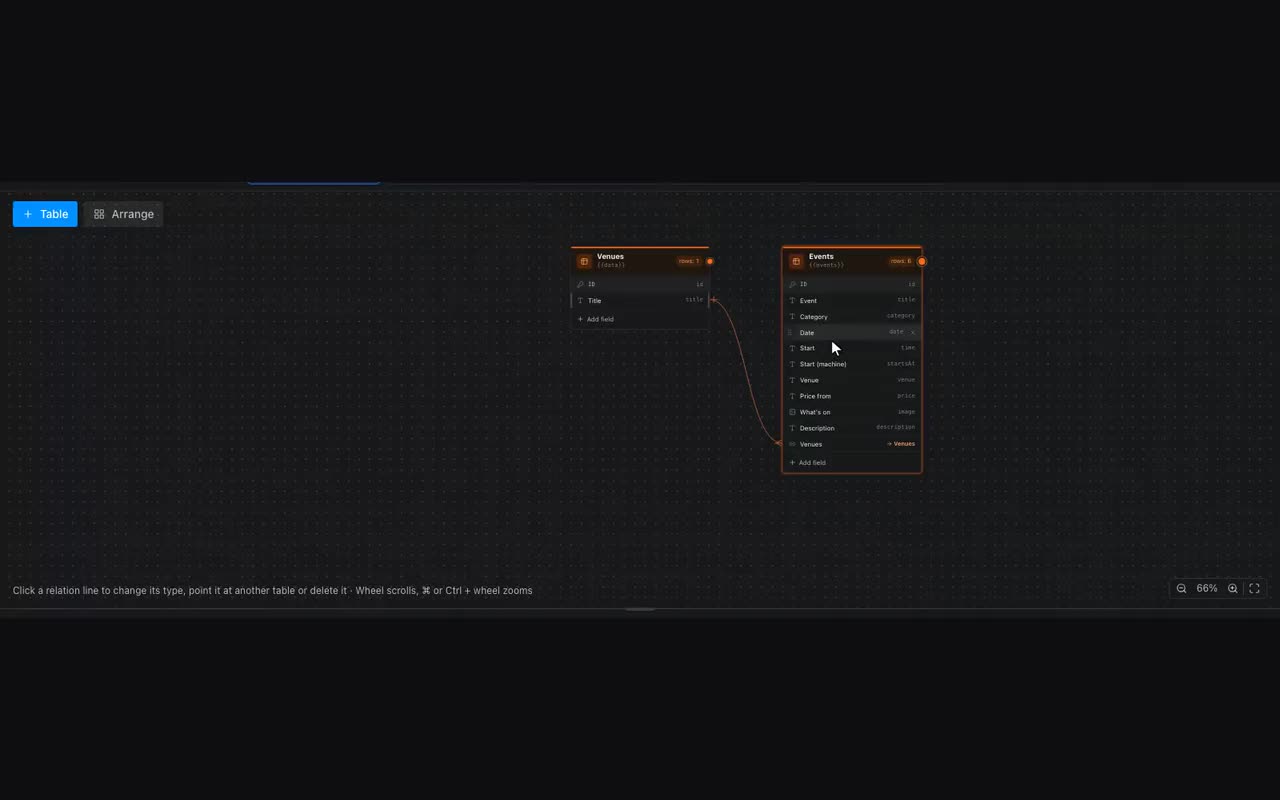
- Every card has a coloured dot to the right of its header. Press the Events dot and, holding it, drag onto the Venues card. Let go.
- The New relation window opens. Choose how many rows sit on each side: Many → one (many events at one venue — the usual case), One → many, One ↔ one or Many ↔ many. The sentence under the choice says what it means for your tables, and the line below it says which table gets the column. The arrows between the tables swap them. Press Create relation.
- Events now has a column with an arrow → Venues — that is the link. The line ends at the Venues column the link is labelled by in the list (usually Name), or at the ID row above the columns when it is labelled by row ID. The line ends show the type: a fork is “many”, a bar is “one”.
- Click the line to open that column, change the relation type, point it at another table, or delete it.
Step 3. Fill in the rows and show them in the app

- Click a card’s header — the table’s rows open below. Click a column — the columns open, each with its detailed settings (choice options, date format, formula).
- Add row makes a new row; values are edited right in the cells. Many rows at once — Import from Excel, CSV or Google Sheets; Export — back to a file.
- Show these records on a screen puts a list on the open screen that draws a card for every record by itself.
- Press Publish — rows typed in the editor reach the app. What visitors write themselves (requests, reviews, bookings) appears at once, without publishing.
Step 4. The same from a phone
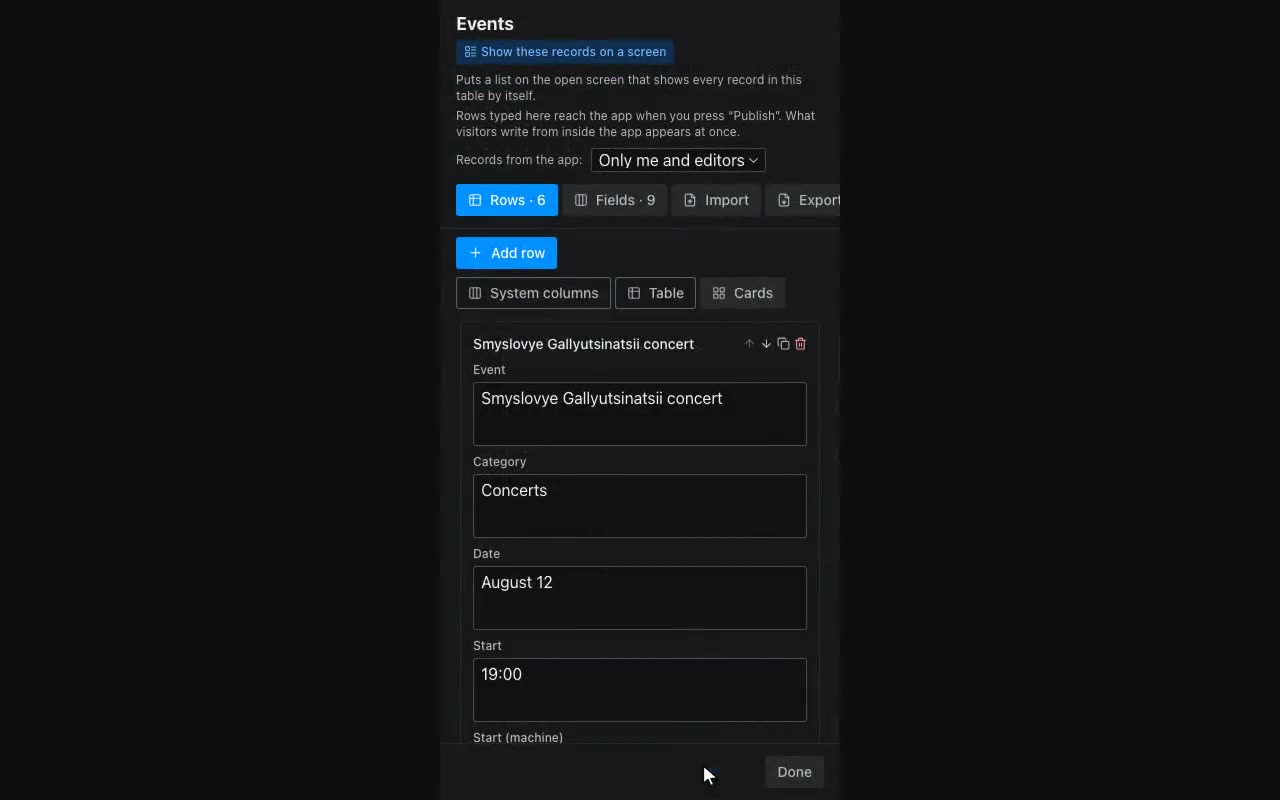
- In the bottom bar tap Data, then Table schema — the schema opens full screen.
- Tap a card — a bar appears at the bottom: Open (rows and columns), the pencil to rename, the bin to delete.
- Move the schema with one finger on an empty spot, zoom with two. Linking works the same: drag one card’s dot onto another.
Good to know. Cards move by their header, and their places are saved in the project — the schema looks the same on another computer. Arrange lays everything out again by itself: lookup tables to the left of the ones that point at them. The mouse wheel moves the schema, Ctrl or ⌘ + wheel zooms. Drag the top edge of the table below to change its height; the arrow on the right collapses it. “Rows: N” on a card also counts rows sent by visitors.