Filtering and searching a list
Chips or an input remember a value, and the list filters by it.
The pattern is always the same: something remembers a value — the list reads what is remembered in its filter.
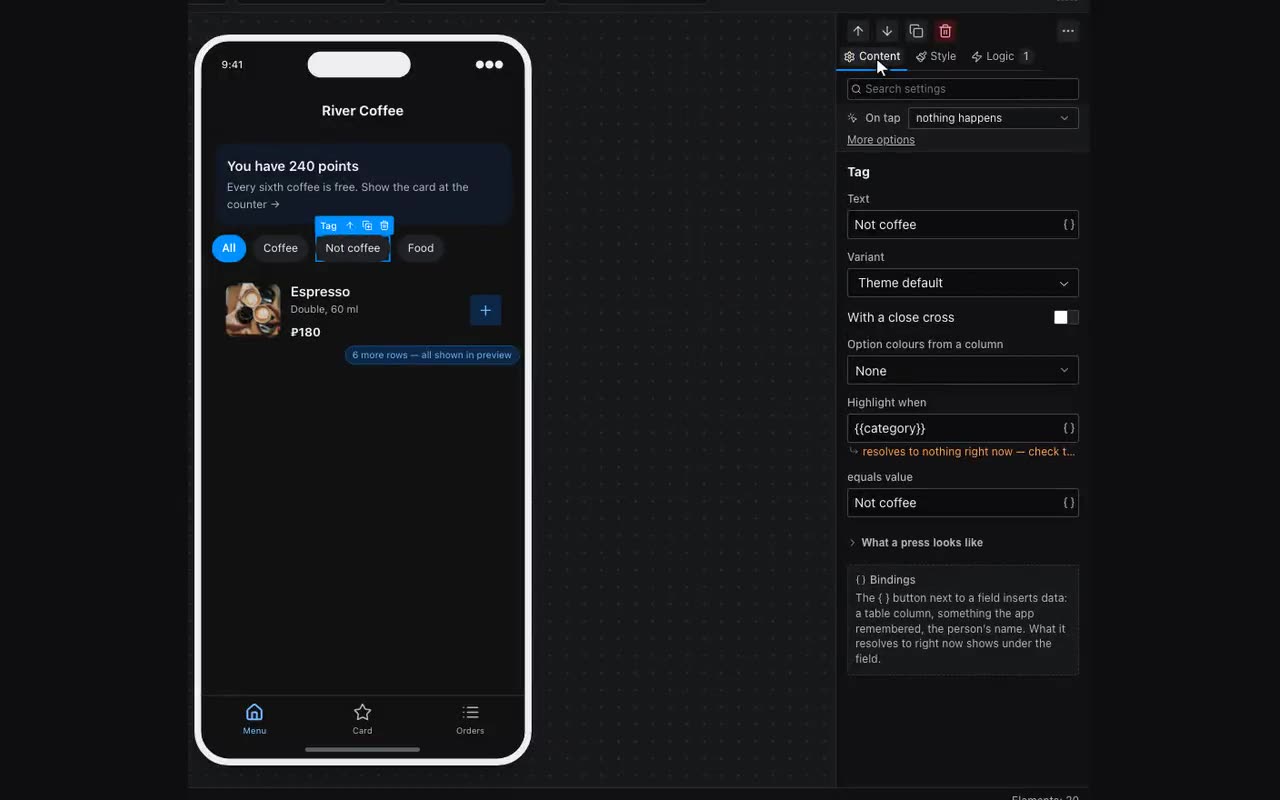
- Place Filter buttons above the list and pick the column the options come from, so the chips always match your data. Type options separated by commas if there is no table. The “show all” chip is a setting next to it. The look of the pills lives under “How the tags look”, where nine colours sit as a grid: rows “normal / selected / pressed”, columns “fill / text / border”.
- In “Which list to filter” pick the list — that is all. The name in memory for the filter, the filter field and the filter value are set for you; taken slots are left alone — the link goes into the first free one of the four.
A list has four filters. The first is usually a search by title, the second a chip bar; the third and fourth appear in the properties as soon as the one before them is filled. That is where a standing condition goes — the kind a visitor never switches: “Status” = Published, “Starts” after {{now}}. Filters work together: a record shows when it matches every one of them.
“Hide options” — for saying what a list never contains. Pick a column with options in “By which column” on a filter card (List, Several from a list, or any column whose values repeat) and its options appear under the comparison. Tapping one crosses it out: rows with that value stay out of the list. The value field can be left empty — the slot works anyway — or keep holding the chip bar: “show the chosen section, but never the cancelled ones” is one filter, not two.
A text search works the same way: an input named q, with the list’s filter value set to {{q}} and the comparison set to “contains”.
The strip shows only the options that appear in the records, not every option of the column: a chip for an empty category leads to an empty screen. If the options are set up in advance and you want all of them, switch “Which options to show”. Extra ones are taken out by tapping them in “Hide options”.
A third choice is “Only those the record has”. The strip then stops being a filter and becomes the list of one record’s categories: put a binding into “The record’s own values” — {{selectedEvent.taxonomy}} on an event page, or {{item.taxonomy}} inside a repeater. The order comes from the column, so two records filled in the same way look the same. If the binding resolves to nothing, the strip behaves as usual.
A plain Chip or Badge shows a record’s categories too: bind its text to a “several from a list” field — {{item.taxonomy}} — and every value becomes its own pill, each in the colour set for it in the column. Before, the whole enumeration was drawn as a single pill.
Options can also come from a date or time column — the strip then holds the days on which something happens, one pill per day rather than per session. They are labelled with that column’s own mask (“8 August”), while the filter gets the machine-readable date, so “Exact match” against such a chip selects the whole day.
When a column stores a date together with a time, the strip asks “What to show”: Days or Session times. The second is the same rows asked a different question: one pill per hour something runs at. So one column in the table is enough: a strip of days above the list, a strip of sessions below, both fed by it.
Such a strip has a property of its own — “Days already past” — and three answers. “Keep them on the strip” is how it always was. “Drop them — today onwards” leaves today and everything after it; today stays whole even when all of its sessions have started. “Drop them — only what is still ahead” keeps a day while it still holds one event that has not started, and drops it together with the last one, so the strip never shows a today that opens an empty list. A strip over categories has no such property — categories are never past.
Past events are removed not by the strip but by one more filter on the list: in “Which rows to show” press “Add a filter”, then in the new card set “By which column” to the start time, “How to compare” to “Later than” and “Which value” to {{now}}. An offset goes in the same place: {{now-2h}} keeps what started two hours ago. All three fields matter — a value with no column chosen filters nothing.
The chips themselves are styled in the same properties, under the “How the chips look” heading: chip style (solid, soft, outline, ghost), padding on each axis, its own corner radius and six colours — background, text and border for a normal chip and for the selected one. An empty colour means “follow the theme”, so the chip keeps to the project palette. Every colour can hold a light/dark pair — same picker, tabs at the top; a colour given as a single value stays the same in both themes, so a light chip stays light in a night-mode client. The Style tab edits the strip, not a chip: its background, border and padding belong to the whole surface.
When the column’s options have colours picked in the table, the chips use those colours, and the colour fields in the strip’s properties do nothing for them — otherwise the same option would look one way in the filter and another on a card. If the strip’s own colours matter more, switch “Colours picked for options” to “don’t paint”: the field sits next to the colours and only shows up when the options really do have colours.